JUMP TO
Are you looking to make your own smoothies but don’t know where to start? Don’t worry because in this article I’ll be teaching you how to blend your first smoothie (and become a smoothie hero) in 5 easy steps.
Introduction to smoothies
When I talk to people about smoothies, I always emphasize how easy it is to put together a smoothie that’s both nutritional and tasty. I talk about the health benefits of smoothies, about the ingredients used and the wonderful aromas each smoothie brings with it. Now it’s time to show you how to put together a healthy and tasty smoothie in just a few easy steps.
Sounds simple, right? But how do you actually put together a smoothie that’s both healthy and tasty? How do you choose the ingredients and how do you mix them together? How do you even know how much liquid to add or how much time to blend?
Let’s get practical and start working on your smoothie! For this recipe, you’ll need the following ingredients and quantities, as detailed below. If you have all the ingredients at hand, you can follow along with the recipe. If not, it’s perfectly ok to read the article now and make the smoothie later.
Ingredients List
- 1.5 avocado (peeled and seeded)
- 250 g frozen spinach
- ½ cucumber (sliced)
- 1 banana (peeled, sliced)
- 3 carrots (sliced)
- 1 slice lemon (organic, skin on)
- 1 tsp turmeric powder
- 1 tsp cinnamon powder
- 1 tsp cardamom powder
- ½ tsp Himalayan salt
- 700 ml water
First thing’s first
Let’s start by preparing a dedicated working area with enough space for everything: ingredients, blender, space to work, waste, etc. Take your ingredients out of the fridge, wash them properly and place them nicely on your working area. This is a great time to pause for a minute, trying to visualize the smoothie you’re about to blend. Smoothies are a creative process and great smoothies are made with passion, just like all things food-related.
Back to the working area, I like to have a space for leftovers and another space for peeling and cutting my ingredients. It’s important to cut your ingredients into smaller pieces; this way you’ll be helping your blender to mix everything faster. This step is particularly important if you don’t have a powerful blender, otherwise you risk burning the motor if you blend for longer periods. Last, make sure to remove any seeds (big or small), even from things like apples or pears.

Making smoothies is all about mixing colors, aromas and nutrients.
The recipe
Today we’ll be making a simple green smoothie that is guaranteed to blend easily and tastes great. When it comes to smoothies, the taste is of course very important, but we also have to concentrate on its texture and the nutrients we put into our smoothie. And this one is no exception, since it has a creamy texture and it’s also loaded with all sorts of “good-for-you” nutrients.
The list of ingredients may look scary at first, especially if you’re not used to avocado or spinach. We also use banana, a few spices plus a few veggies, which makes for a very interesting combo. This smoothie will end up having a refreshing tropical taste I bet you’ll enjoy, something you won’t find in any supermarket or smoothie bar. Not to mention the beautiful green color that invites you to take pictures.
But for now let’s get back to our recipe. In the section called “Quick Notes” you can get a basic understanding of how your smoothie will turn out: color, texture, taste, time in the kitchen or number of servings, it’s all there to help you get a better picture of each smoothie recipe. In this example, we already know that we’ll be making a green smoothie with a creamy texture and a tropical taste.
Quick Notes
- Prep Time: 10-15 minutes
- Servings: 5 smoothie jars
- Color: pure green
- Texture: creamy, easy to drink
- Taste: a bit sweet with a cucumber taste, has a simple and pleasant taste
Moving on to the ingredients list, this is where things get interesting.
Ingredients List
- 1.5 avocado (peeled and seeded)
- 250 g frozen spinach
- ½ cucumber (sliced)
- 1 banana (peeled, sliced)
- 3 carrots (sliced)
- 1 slice lemon (organic, skin on)
- 1 tsp turmeric powder
- 1 tsp cinnamon powder
- 1 tsp cardamom powder
- ½ tsp Himalayan salt
- 700 ml water
Quick Note: The quantity of ingredients is relative to the number of servings listed in the “Servings” section above. In this example, we’ll be making 5 servings so the quantities listed below reflect this case.
Before moving to the next section, I want to emphasize that making smoothies isn’t rocket science. There’s always room for improvisation or for errors, and we’ll get to discuss all of these below. For instance, if your smoothie turns out too thick, try adding a bit more liquid. If it turns out having a light texture (I call it “watery”) try adding more banana and/or avocado to thicken it. If it’s not sweet enough, you know what to add (hint: try a sweet fruit).
Step 1: Add Leafy Greens
If there are fresh leafy greens in your recipe, make sure to add them into your blender in this step. Add some water on top (just enough to cover the greens) and blend until everything gets mixed well. This step is important since leafy greens are usually harder to blend when mixed with all the other ingredients.
This step is especially important if you don’t have a powerful blender. By making sure your leafy greens are chopped before adding all the other ingredients, you put less load on your blender and your smoothie will end up having a nicer texture. Our recipe calls for frozen spinach so you can skip this step. If you decide to use fresh spinach instead of frozen, now will be a good time to follow along.
Note: Personally, I don’t emphasize leafy greens in every smoothie but that’s a discussion for another time. Let’s not forget that, while leafy greens come with many health benefits, they’re just a part of the vegetable family. Instead of concentrating only on leafy greens, try adding a wide variety of veggies to your smoothies, not just leafy greens (Hint: how about beets, celery, fennel, or even leeks?).
Step 2: Add Healthy Fats
- 1.5 avocado
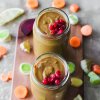
Now it’s time to add your healthy fats, in our case the avocado. I always try using avocado in my smoothies because it’ll make the smoothie creamy and pleasant to drink, while adding lots of beneficial fats. Did you know that avocados are among the healthiest plants you can eat? That’s because it’s loaded with phytonutrients, vitamins and minerals, plus beneficial healthy fats and soluble fiber. Let’s just say that one avocado a day will keep you healthy all your life.
Other types of healthy fats that work great in smoothies are coconut oil, nut butters or freshly made nut milks (cashew or almond being the easiest to make on the go). All of these are great sources of healthy fats, but for now let’s keep it simple and stick to our avocado.
Step 3: Add Veggies and Fruits
- 1.5 avocado (peeled and seeded)
- 250 g frozen spinach
- ½ cucumber (sliced)
- 1 banana (peeled, sliced)
- 3 carrots (sliced)
- 1 slice lemon (organic, skin on)
Notice I said veggies before fruits? That’s simply because I always try to include more veggies and fewer fruits in my smoothies. I believe veggies are better for one’s health while fruits come with too much sugar (fructose) and should be consumed in moderation.
We’ve already added our avocado in the previous section so you can start with the spinach and move your way down the list. Make sure to remove the seeds and peel the ingredients whose skin is not edible.
You probably notice there’s only one other fruit in this mix, besides the avocado, and that’s the banana. Adding banana has 2 roles: will make your smoothie sweet but also helps with that perfect creamy texture I was telling you about. Please use an organic banana if you can, this way you support traditional farmers and your own health, since organic bananas come with fewer pesticide residues.
Step 4: Add Spices and Superfoods
- 1 tsp turmeric powder
- 1 tsp cinnamon powder
- 1 tsp cardamom powder
- ½ tsp Himalayan salt
I almost always finish my smoothies with some kind of spices and superfoods. Smoothies are a great way to include some of these wonderful plants that come with so many health benefits. But they also add taste and flavor to your smoothie, that being another reason I like to include them in my recipes.
Of course, using only spices and superfoods won’t make for a healthy drink. Spices and superfoods are a nice extra but let’s not get fooled by their “superpowers”. Please don’t replace real food (real plants) with powders of any kind.
Besides the one I use in this recipe, other common spices and superfoods are: vanilla powder, fenugreek powder, ginger powder, fennel seeds, extra virgin coconut oil, flaxseeds, chia seeds, hemp seeds, acai powder, maca powder, dandelion root powder, plus herbs like dill, parsley or basil.
Step 5: Liquid
- water (700 ml or just enough to cover the ingredients)
Some people might tell you that you need to add the liquid in the beginning. Others might tell you that you need to carefully measure the quantity of the liquid. In my opinion, you can add as much liquid as you need to, depending on the texture you plan to obtain and based on the ingredients you already have in the blender.
Let’s look at this for a second: Liquid is there to help your blender mix all the ingredients together and to help you obtain the desired texture. Less liquid means you’ll end-up with a thicker drink, more liquid makes for a “watery” smoothie. Less liquid also means your blender will take more time to chop all the ingredients, and can even have trouble chopping them perfectly.
The thing is, you can always add more liquid if you need to but it’s impossible to remove excess liquid, right? My advice is to start with less liquid and adjust the quantity if needed. Sounds good?
Personally, I like adding just enough liquid to cover my ingredients and a bit more. If I feel that my smoothie doesn’t blend easily, or if it turns out too thick, I can always add more liquid and blend for 20-30 seconds more. The trick is to leave enough room in your blender to be able to mix the ingredients easily or to be able to adjust the quantity of liquid. Make sure that your ingredients are not taking up more than 2/3 of the smoothie bowl, and you’ll be fine.
How to blend your smoothie
By now you’ve probably added all the ingredients into your blender and just enough water to cover them. Now it’s time to make things happen, so let’s blend your first smoothie!
My advice is to start your blender on medium speed and let it run for 20 seconds or so. Increase the speed if you feel like you need more power but pay special attention to the sounds your blender makes. If you feel that it takes some effort to mix everything, stop the blender, remove the top and look inside to see if there’s enough liquid and enough space for the ingredients to turn and mix. Feel free to add a bit more liquid if your blender seems to struggle.
Alternate between medium and high speed until all the ingredients have combined nicely. You can also use the pulse function a few times as this will chop the ingredients faster, allowing your blender to mix everything faster. If your blender seems to have a hard time doing its job, allow it to cool down by taking a break every 1-2 minutes. Use a spatula to mix the ingredients while your blender is off and repeat the process until you reach the desired consistency.

Avocado and banana will make your smoothie creamy and easy to drink.
How to store your smoothie
Now that your smoothie is ready, it’s time to think about storing it properly. There are a few things to remember here and we’ll discuss them one-by-one below.
Where to store it
My recipes usually make between 4-6 servings, which means you’ll most likely end-up with more content than you can handle at one time.
You can store the remaining smoothie in the fridge for up to 3 days. Make sure to use jars or bottles with a cap because this way you prevent oxidation. Oxidation can happen when you expose your smoothie to air, heat or light, causing nutrients to break down over time. The nutrients in smoothies are very fragile, so you need to avoid oxidation as much as possible.
Personally, I like storing my smoothies in glass bottles or smoothie jars, with a tight lid. You can always reuse old tomato sauce bottles, olive jars or other types of mason jars. If you travel and don’t want to risk breaking your glass bottle, you can buy one of those Tritan smoothie containers with a safe lid that’s designed to prevent spillage.
What containers to use
You can store smoothies in glass or plastic containers. Personally I prefer glass, I have a small collection of smoothie jars, mason jars, and glass bottles that I pretty much use all the time. You can buy smoothie jars from almost any supermarket, or you can reuse mason jars or ketchup bottles. If you decide to reuse mason jars, you can remove the labels using plain water and baking soda and they’ll look like new.
I also like using the Tritan (a kind of plastic) containers that came with my blender, just because they’re very easy to carry around. I like the solid plastic material they’re made of, plus they wash easily and they seem to be leak proof, which makes them perfect for carrying around in my backpack.
Glass vs Plastic
You probably know glass is a safer and healthier material compared to plastic. That’s because glass is non-porous whereas plastic will eventually leach some of its chemicals into the food (in our case smoothie). Plus glass can be cleaned completely whereas plastics will become “cloudy” with time and you’ll eventually have to throw them away.
Personally, I find glass to be a better option than plastic. Glass is a reusable material which, if treated right, will last you a lifetime. Yes, plastics are available everywhere these days and they’re very cheap, but you’ll eventually have to throw them away, which isn’t very nice for the environment.
Reasons to choose glass
- a healthier material overall.
- it’s a reusable material.
- easier to clean and can be cleaned perfectly.
- no foreign smells.
- looks better for presentation purposes.
- will keep your smoothie cold for longer, even in the hot days.
Advantages of Glass vs Plastic
- is non-porous – plastics leak chemicals while glass is 100% non-reactive.
- it’s not made with any weird chemicals, compared to plastics.
- it’s easier to wash, this is important since we’re using lots of healthy fats – you’ll thank me after a week or two.
- it’s better for the environment – glass can be reused indefinitely.
- it’s cheaper in the long run (since glass is 100% reusable).
- glass is healthier compared to plastics (there are no allergies or health conditions associated with using glass).
- clear glass looks nicer and it’s better for presentation purposes, while plastics will get “cloudy” with time.
- glass will keep your drink colder – great in those summer days when you want your drink cold.
Disadvantages of Glass vs Plastic
- glass comes with more weight.
- glass has a risk of breakage and needs additional protection.
- it’s harder to carry it around on a daily commute.
- not all glass containers are heat resistant (important for storing hot liquids only, doesn’t apply to smoothies).
Conclusions
In this article, you’ve learned how to put together your first smoothie and how to store it correctly. Since you’ve made it so far, it’s safe to say you’re already a smoothie hero so congratulations! You should be proud of yourself and, even though your smoothie may not have ended up the way you planned (I’m just guessing here), I hope you’ll not get discouraged.
Let me tell you a little secret: Smoothies are not rocket science. Period! They’re more about learning how to mix plants with different textures, giving life to wonderful tastes and aromas. Smoothies are about being creative in your own kitchen using real food. Smoothies are about appreciating what nature gives us every single day. Smoothies are about real plants and their wonderful mix of nutrients.
There is no right or wrong way to blend smoothies; it just takes a bit of experience and patience to make it right for you. While learning how to make great smoothies can take a bit of trial and error, don’t forget that making the switch towards smoothies is already a big step for improving and maintaining your health. Enjoy your smoothie and don’t look back, the next one will definitely turn out even better.
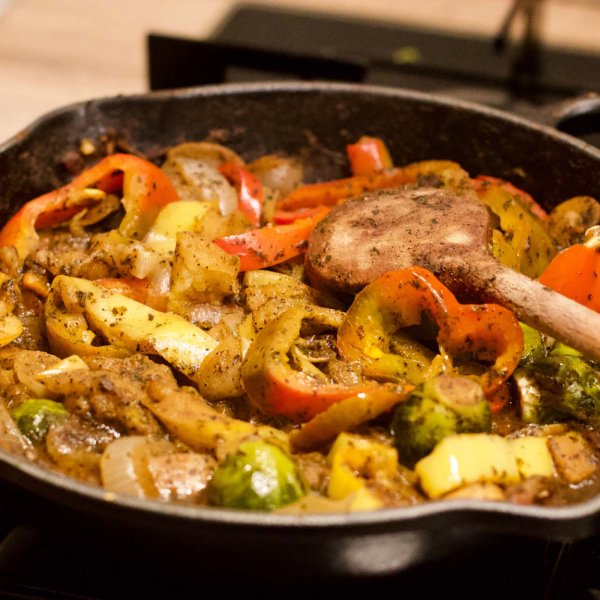
More Smoothie-Making Inspiration
- The Simple Guide to Making Smoothies
- How To Make The Best Green Smoothie + Recipe
- How To Buy Fruits And Veggies On A Budget
- Smoothies 101: Learn How to Make Healthy and Tasty Smoothies
Smoothie recipes you have to try:
- 5-Ingredient Simple Green Smoothie
- 5-Ingredient Simple Tropical Smoothie
- Banana Split Smoothie
- Mad Mango Smoothie
- Almond Butter Keto Smoothie
- Melon Spinach Creamy Green Smoothie
- Avocado, Spinach and Grapefruit Green Smoothie Rocket
- Berry Revitalizer Smoothie
I hope you enjoyed my little smoothie-making tutorial. Please let me know what you think in the comments below.